Pages

Thursday, July 26, 2012

DINO curtains

 I've totally forgotten that I haven't shared my "dino curtains" that I made for the twins' room several months back. I didn't use a pattern or anything, so I was pretty proud of myself for making 4 uniform panels that miraculously lined up properly.

Obviously, the valance (if that's the right term) is a wee-bit shorter in width than the curtains. That's mostly because I decided after-the-fact that I wanted the curtains to go a couple of inches beyond the window so that light isn't let in on the sides. I don't plan on keeping the valances too much longer, anyways, so I'm not particularly grieving over that fact. It's annoying, to a semi-perfectionist, but no grieving.  


I plan on using the scrap fabric to make green, orange and dino fabric-posters in different sizes as wall art. Have you seen that in DYI shows? You wrap and staple it to the back of a wooden frame? I plan on doing stuff like that in my room too. I hope to knit or sew some sort of dino decor in felt for the "blah," bare blue walls as well (did you like that alliteration?...I wasn't really planning on it). I'm still trying to think how to do that and not be too overkill.

Tuesday, July 10, 2012

Free-form pattern: Elaine


On Friday, before heading to a Japanese Grill a couple towns away, I hit up a Joanne Fabrics in the adjoining parking lot. Who could resist, right?

There were 50% off sales on all of the fabrics, plus a 10% off your total order coupon...so I induldged in a couple more jersey knit fabrics for more quickie dresses, a satin fabric, and whatever this fabric is. It's probably polyester. One thing I knew was that this chica was going to fray like no one's business. It's air-light, see-though of course...perfect for wearing over another tank top.


So let's fast-forward to yesterday. I knew that this fabric was going to evolve into a tank top, but I didn't want to stick to a pattern because I didn't think I'd find this sort of shape (and I was pretty certain that I could fiddle around and draw my own pattern).
I grabbed a few sheets of newspaper (I couldn't find my brown packaging wrapping paper which would have been even better) and tapped 4 of them together. I took a tank top with a similar shape to get an idea of what the dimensions needed to be, and left about an inch of extra room for a seam allowance. I cut the front piece out, folded the newspaper hotdog style and trimmed all of the edges to make it more symmetrical than my guesstimates.  Then, I traced out the back, and changed the neckline to be shallower.

I pinned the pieces together, sewed them while really reinforcing the edges. I did two straight line stitching and then a zig-zag along the raw edge to make sure that this sucker doesn't come apart or fray too badly while washing.

Next came the edging. I used store-bought tape trimming in a matching color, and didn't even bother pinning it to the edge. Rather, I just tucked the raw edge into the middle of the tape as I went.
It's not perfect. There were a couple of places where the raw edge came loose from the tape because I didn't shove it in far enough, and my stitching could have been straighter. I was really bummed that there is a little hole starting underneath the armpit. I must have snagged it underneath the footer, or snipped it some how. I painted clear nail polish on it for now, but I'll have to figure out a better way to patch a delicate material such as this.

It's a tiny bigger than I'd like it, but it looks neat. I'm just proud I made my own pattern and it seems wearable and not too extremely "Home-Ec." Plus, it only took me a few hours!


Sunday, July 1, 2012

FO: my "20 minute" (or 2 hour) dress


I finished another dress! Hurray! This one was Faith Towers' supposed "20 Minute" Dress.

Did it only take 20 minutes? Of course not. It's like that knitting pattern, The 3-Hour Vintage Sweater pattern that I was suckered into knitting several years back, that took more like 3 days rather than hours.

Anyways, it was a faster sew. The problem is that jersey knit fabrics are really hard to cut. Especially if you're like me and try cutting it on carpet, and don't have anything to draw lines on the fabric while measuring because the pens don't show up on this sort of pattern. *sigh* The took most of the time. And frustration.

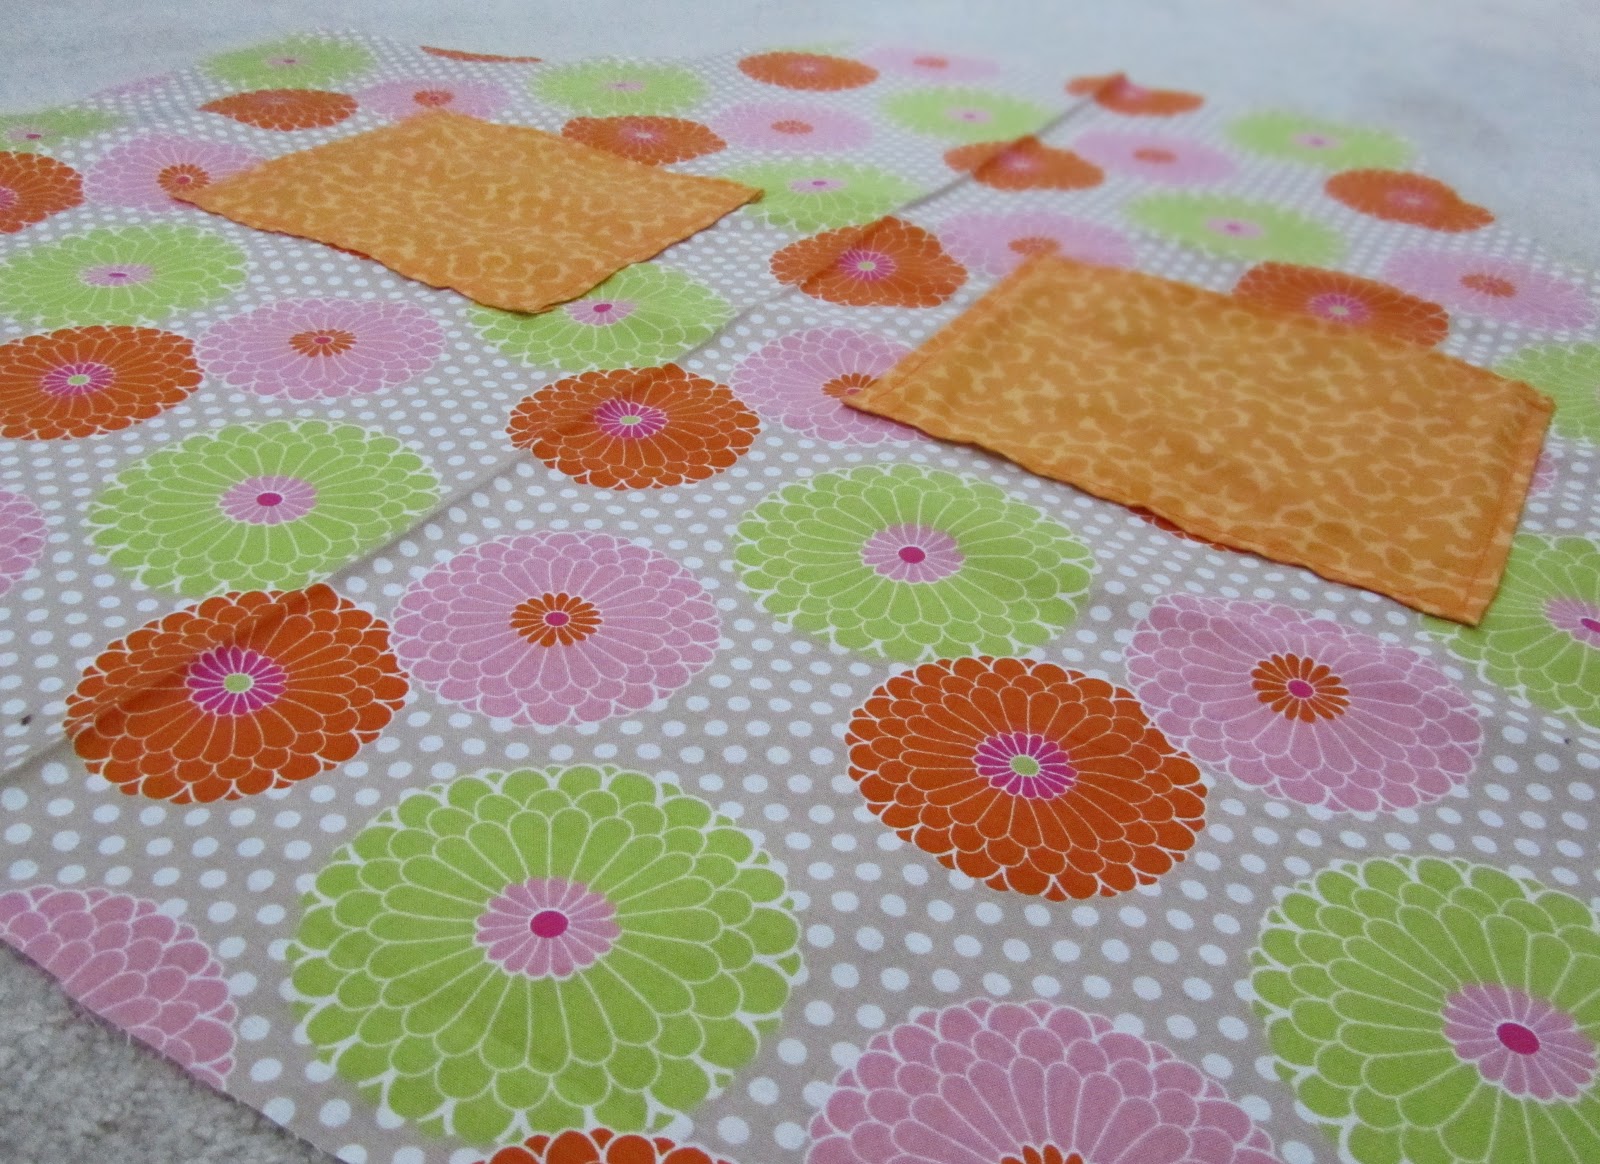
Joanne Fabrics didn't have much in terms of cool fabric prints in Jersey. I like this print, but really, it was literally their coolest choice.

My size is close to hers, even though I'm wider than her. I went with the rule of: armpit-to-armpit +2'' and Hip to Hipt+6 inches.  I only added 1'' to each panel.

Here's some great tips if you plan on sewing this: learn from the designer's photo! The reason why her's may have more charm than other versions sewn is because 1.) she has a really cool print that isn't monotonous, and 2.) (although she didn't go through the extra effort that I had to to achieve this) she naturally had that black strip running along the front of the dress that breaks up the print. If you don't have that naturally, do what I did and cut a 1.5-2'' strip and sew it to the front panels so they get sewn together while you are sewing down the center front (of course, you'll want to subtract from the front panels since you added extra length). It looks a whole lot better than sewing two patterns next to each other that may or may not match up. 3.) she doesn't mention how many inches down to sew the elastic casing...I placed it 3'' below the base of the armpit. 4.) In retrospect, it would have been easier to sew the casing before sewing the shoulder. You might want to do that. Otherwise, how easy is it to measure, pin and sew accurately along a "U" shape there? 5.) This added extra time too, but my fabric rolled in on itself, so I did end up sewing the bottom hem. It looked too "home-made" to not do that. I planned on this, so my panels ran 1.5 inches longer than hers (37.5'') to accommodate. 6.) I sew a line close to the the raw edges as protection against out-of-control fraying.

I'm still trying to make out the words. However, it's kind of like fabric graffiti. Neat.


Thursday, June 28, 2012

FO: Sexy Red Dress


Project: See & Sew dress B5546
(a.k.a "Sexy Red Dress")
Start Date: June 22nd, 2012
Finish Date:  June 28th, 2012
Store: Joann Fabrics (pattern & fabric)
Fabric: Jersey knit
Yardage: 2 yards 


This is how the West was won: pins. Those darn sleeves gave me such a run for the money, I put the dress on hold for a couple of days before I went back at it. It's not perfect, but it looks fine. 

The bodice is a bit too large for me. It looks fine if you're out to seduce every living male creature by screaming, "hey, look at my bra" by the flaps just hanging looser than what the photo suggests. Especially if you bend over.  I'll definitely have to rig some sort of button or Velcro thing underneath when I get closer to needing this for some wedding or party function because I'm super self-conscious when it comes to those sorts of things. I'd be fixing it all night.

When I am able to get to the nearest store with cool printed jersey fabric, I'm gonna sew myself Faith's 20 Minute dress that I'm dying to make! Less sewing? No hems? Comfy dress? 20 minutes?? Gotta love it!

Saturday, June 23, 2012

Project: Sexy Red Dress

The fabric has been cut, and the Sexy Red Dress is underway.

This will be my first real dress project. I'm hoping it turns out well, because the material is knit jersey, and it's soft and stretchy-what every woman loves in a summer dress-but it's a biotch to work with.  (Dislike.)


This was bought at JoAnne's Fabrics during my Flower Apron raid trip. I've been itching to work on this ever since I've laid eyes on it. I paid my dues with the apron, and now it's time to get this done! I can't wait to wear it (assuming that it turns out at least half decent).

I set the iTunes to Madonna's old classics for this one. It just felt right.


So far, the bodice is almost done. The two front pieces are all sewn to the back, and the little hole for the skirt tie is sewn as best as I could. However, the sleeves gave me the most trouble, while doing the "narrow hem." I couldn't iron it flat (and I didn't really want to anyways since it was ruining the fabric), and so the hem wouldn't stay put on the curve while sewing. Not to mention sewing a jersey fabric stinks. Grr. Grr. Grr. One sleeve is fully complete, though. The other needs to be re-cut with my leftover scraps. Yeah, we got into a cat-fight. It won.
But I will win the war.
I will win the war...

Wednesday, June 20, 2012

FO: Flower Apron

Done! I completed it yesterday, before dropping myself onto my bed in a vegetative mode to prop up my complaining foot (I had surgery on it to take out part of my outer bone, two weeks ago). I didn't have too many bumps on the road, but it wasn't all idiot-proof.

Project: Stitch 'n Save M6536 Apron
Start Date: June 17th, 2012
Finish Date:  June 19th, 2012
Store: Joann Fabrics (pattern & fabric)
Fabric: Cotton
Yardage: 1.5 yards- main color, 1 fabric quarter- contrast

 
When it came to doing the top of the apron, where the orange fabric is, I had to fudge it around so it fit correctly. Either I cut the pattern wrong in width, or maybe it was supposed to fit like that..who knows, but to me it seemed like a red-flag zone. I felt like it should be longer in height.

The tubing on the armpits also gave me some trouble. The instructions wasn't clear enough for a newbie like me. After sewing the wrong sides together and flipping it over...and then sewing it to the other side, the tubing was pretty narrow on the outer-most edges for the apron tie that had to be threaded through it.

Sewing the Pockets to the apron.


Stitching on the pockets: not so bad?
I decided not to do the rickrack ribbon and such embellishments that the pattern called for. I'm much too simple in taste for that. I just went plain-Jane and let the contrast fabric and one piece of orange ribbon do all of the talking. I think it looks a little more sophisticated that way, even in a cutesy fabric pattern.

Other alterations to the pattern were: going size Medium on the chest and size Large for the body of the apron, and also shortening this apron by around 2 inches (it's still pretty long). 


Rolled up Apron tie. Love it!


On to my next mission: that sexy red dress number!

Monday, June 18, 2012

Work in Progress: Apron


I've officially started my first pattern, an apron. It seems like a beginner's "first sewing project." I imagine it's relative to hearing a beginner pianist play "Fur Elise" (although I'll have you know that even though it's the classic "piano student" song, it's intermediate level). The package says "easy," so let's see if they are correct.


Project: Stitch 'n Save M6536 Apron
Start Date: June 17th, 2012
Store: Joann Fabrics (pattern & fabric)
Fabric: Cotton
Yardage: 1.5 yards- main color, 1 fabric quarter- contrast

Here's what I've accomplished so far:
Ironing the Fabric.

Ironing the pattern.

Cutting out the pattern (maybe not as nicely as I should have), pinning them to the fabric & cutting out the fabric.


I was a bit confused while cutting the pattern, because the armpit's (size Medium) dashed line ran into a larger size, although when you follow that line even further, it says "medium" again. That really threw me off. I had to ask my MIL about what I should do, and why there are different sized circles. Newbie question, I'm sure. Oh, and after researching youtube on cutting out patterns, I found out after-the-fact that I should cut those triangles outward. Whoops. At the time, I didn't realize what those meant.

I am now all ready to thread the machine and sew it up.
Stay tuned for the finished results. Wish me luck. I need to go out and buy sharper scissors! :)

Halloween sews: the Corpse Bride

Let me show you one more photo of a past sew, the "Corpse Bride."

It's rather funny, because not only was I poking fun of the Tim Burton movie after it came out, but I made that costume the Halloween before my wedding. The next wedding dress I wore was a little more, um, elegant.


Really, I just free-handed the dress. Take an inexperienced sewer, no pattern, a pair of scissors, and extreme luck, and voila! It happened to fit. The top is a velvety fabric made into the main frame of the dress (you'll see the rest of it poking out of the bottom of the dress, on my legs), and the overlay of the skirt is a satin material. It was a great first sewn dress, because I didn't have to worry about hemming anything but the top, mainly because I had to thread elastic through it. Even the top of the skirt had ribbon sewn onto it. A great extra touch that can hide a multitude of errors. Seriously though, I think it actually looked half decent under there. I took the scissors and hacked away the bottom of the skirt to give it some wear-and-tear in the graveyard look.

Other than that, I only took a decorative comb-pin to secure the veil to the black wig. Fake pearls, off-white roses and black lipstick/nail polish give it that extra edge. A few kids were scared...poor dears. ;)

Sunday, June 17, 2012

Turtle Shorts: my first project (6th grade)

I would like to introduce to you my first sewing project: turtle boxers. Made in the 6th grade.... 1996 or something.

Let's face it. Everyone has their weird quirky thing that they are into in Middle School. For some reason or another, my thing was turtles. Stuffed animals, figurines, turtle lamps, I guess turtle fabric for shorts...
Yeah, embarrassing. Good thing I got of that obsession quickly.

However, for a project for a kid, they didn't turn out half bad. In fact, they are still wearable...and comfortable, for that matter. A little faded, I'll give you that.


I do remember the (now faceless in my memory) Home Ec teacher's sewing tips, like: having to press your seams, how to thread a machine, and how to "try" to sew straight lines. Obviously, I rebelled a little bit (photo below).


I'm really proud of these dorky little shorts. It makes me want to find a pattern and try it again some day. Maybe even try pajama bottoms. But not turtles. That pattern can retire.


What was your first project?

Hello

Hey guys.
I've created this blog to document my adventures as a newbie sewer who started only with the knowledge learned many years ago from a 6th grade Home EC course on how to sew boxers, as well as any other trial & error knowledge gained from fiddling around making pillowcases and curtains. Watch me grow in skill with some fabric and needles...it shall be interesting!